Unlock the Secret to Homemade Mozzarella: Just 3 Ingredients, No Rennet Required!
Imagine slicing into a ball of warm, creamy mozzarella, still soft and yielding from your very own kitchen. Paired with ripe garden tomatoes and a drizzle of balsamic, or melted generously over a bubbling pizza, there’s truly nothing quite like it. If the thought of making your own cheese has always seemed daunting, prepare to have your mind (and taste buds) blown. This isn't just an easy recipe; it's arguably the easiest way to make mozzarella cheese at home, using only three simple ingredients and no special rennet or citric acid!
Forget complex techniques and obscure ingredients. We're talking about a process that takes less than an hour from start to finish, yielding delicious, fresh mozzarella that tastes infinitely better than anything you'd buy pre-packaged. Whether you’re a seasoned home cook or a complete novice, this guide will walk you through every step to creating your own incredible cheese. Get ready to experience the pure joy of homemade.
Why This Rennet-Free Mozzarella Recipe Is a Game Changer
Many traditional mozzarella recipes call for rennet, an enzyme derived from animal sources (or microbial alternatives), and often citric acid to adjust pH. While these methods produce fantastic results, they can add layers of complexity and ingredient sourcing that deter many home cooks. Our method simplifies the entire process without compromising on taste or texture, making it the perfect entry point for anyone curious about how to make mozzarella cheese.
- Simplicity: With just milk, vinegar, and salt, you eliminate the need for specialized cheese-making ingredients, making this recipe incredibly accessible.
- Speed: From heating the milk to shaping your final cheese, the entire process can be completed in under an hour. This means fresh mozzarella is always just a quick session away!
- Pure Flavor: Experience the true, delicate taste of fresh mozzarella, unadulterated by preservatives or artificial flavors often found in store-bought varieties.
- Customization: As you gain confidence, you can easily adjust the salt level to your preference, or even infuse your cheese with herbs and spices.
This approach harnesses the power of acidity (vinegar) to coagulate the milk proteins, a time-honored technique that delivers beautiful, stretchable curds. It’s a wonderful introduction to the world of Homemade Mozzarella Cheese: Your Simple Guide to Creamy Goodness, proving that gourmet results can come from humble beginnings.
Gather Your Simple Ingredients and Essential Tools
Before diving into the magic, let's ensure you have everything ready. One of the best parts about learning how to make mozzarella cheese this way is how basic the requirements are!
The 3 Magic Ingredients
- 1 Gallon Whole Milk: This is critical. For the best results, use whole milk that is pasteurized but *not* ultra-pasteurized (UHT). Ultra-pasteurized milk has been heated to such a high temperature that its proteins are significantly denatured, making it very difficult for them to form strong curds. Look for milk labeled simply "pasteurized." The higher fat content of whole milk is essential for that creamy, luscious texture and superior melt.
- Plain White Vinegar: This is your secret weapon, replacing rennet as the coagulant. The acid in the vinegar causes the milk proteins to separate into solid curds and liquid whey. Stick to plain white vinegar to avoid imparting unwanted flavors or colors. Approximately 1/2 cup to 3/4 cup is typically needed, but have a full cup on hand just in case your milk needs a little more encouragement.
- Salt: Essential for flavor! We recommend starting with 1 ½ teaspoons of fine sea salt or kosher salt. As you become more experienced, you can experiment with the amount to suit your personal taste. Salt not only seasons the cheese but also helps draw out additional moisture, contributing to a better texture.
Essential Equipment for Success
Having the right tools makes the process smoother and more enjoyable:
- Large, Heavy-Bottomed Pot: A gallon of milk needs space. A heavy bottom helps distribute heat evenly and prevents scorching.
- Digital Thermometer: Absolutely essential for precise temperature control. An instant-read thermometer is perfect. This is key to successful curd formation and a good stretch.
- Large Spoon or Whisk: For stirring the milk as it heats.
- Colander or Strainer: To separate the curds from the whey.
- Cheesecloth: You'll need 2-3 layers of good quality, unbleached cheesecloth. This will line your colander and allow you to squeeze out excess whey effectively.
- Large Bowl: To collect the whey as it drains, and for initial curd handling.
- Microwave-Safe Bowl: For heating and stretching the curds.
- Heat-Resistant Gloves (Optional but Recommended): The cheese will be HOT during the stretching phase! Heavy-duty rubber gloves or even clean kitchen gloves can protect your hands.
Step-by-Step: Your Easiest Mozzarella Journey
Ready to get started? Follow these steps closely, and you'll be enjoying fresh homemade mozzarella in no time!
-
Gently Heat the Milk
Pour the gallon of whole milk into your large, heavy-bottomed pot. Place it over medium to medium-low heat. Stir the milk frequently and gently with your large spoon to prevent it from sticking and burning at the bottom. Continuously monitor the temperature with your digital thermometer. You want to slowly heat the milk to a temperature between 105-115°F (40-46°C). Aim for around 110°F (43°C) as a sweet spot. This temperature is warm enough to encourage curd formation without overcooking the milk proteins.
-
Introduce the Vinegar and Watch the Magic
Once your milk reaches the target temperature, remove the pot from the heat. Slowly pour in 1/2 cup of plain white vinegar, stirring continuously for about 30 seconds. You'll immediately start to see the milk separate! Wispy white curds will begin to form, leaving a clearer, yellowish liquid behind—this is the whey. If after a minute or two, the separation isn't distinct (the whey isn't yellowish and clear), add another tablespoon or two of vinegar and stir gently until clear separation occurs.
-
Let the Curds Rest and Firm Up
Once you have a clear separation of curds and whey, stop stirring. Cover the pot with a lid and let it rest undisturbed for 15 minutes. This allows the curds to fully consolidate and firm up, making them easier to handle and ensuring a better final texture for your mozzarella.
-
Strain the Curds from the Whey
While the curds are resting, prepare your straining setup. Place your colander over a large bowl (to catch the whey) and line the colander with 2-3 layers of cheesecloth. Carefully pour the contents of your pot into the cheesecloth-lined colander. The curds will collect in the cheesecloth, and the yellowish whey will drain into the bowl below. Alternatively, you can use a large slotted spoon to scoop the curds directly into the cheesecloth.
-
Squeeze Out Excess Whey
Gather the edges of the cheesecloth together, forming a ball of curds. Begin to gently squeeze the ball to expel more whey. As the curds cool slightly, you can squeeze harder. This step is crucial! The more whey you remove now, the firmer and more stretchable your mozzarella will be. Continue squeezing until you can hardly get any more liquid out. You should be left with a fairly dry, rough ball of cheese.
-
Salt, Microwave, and Stretch!
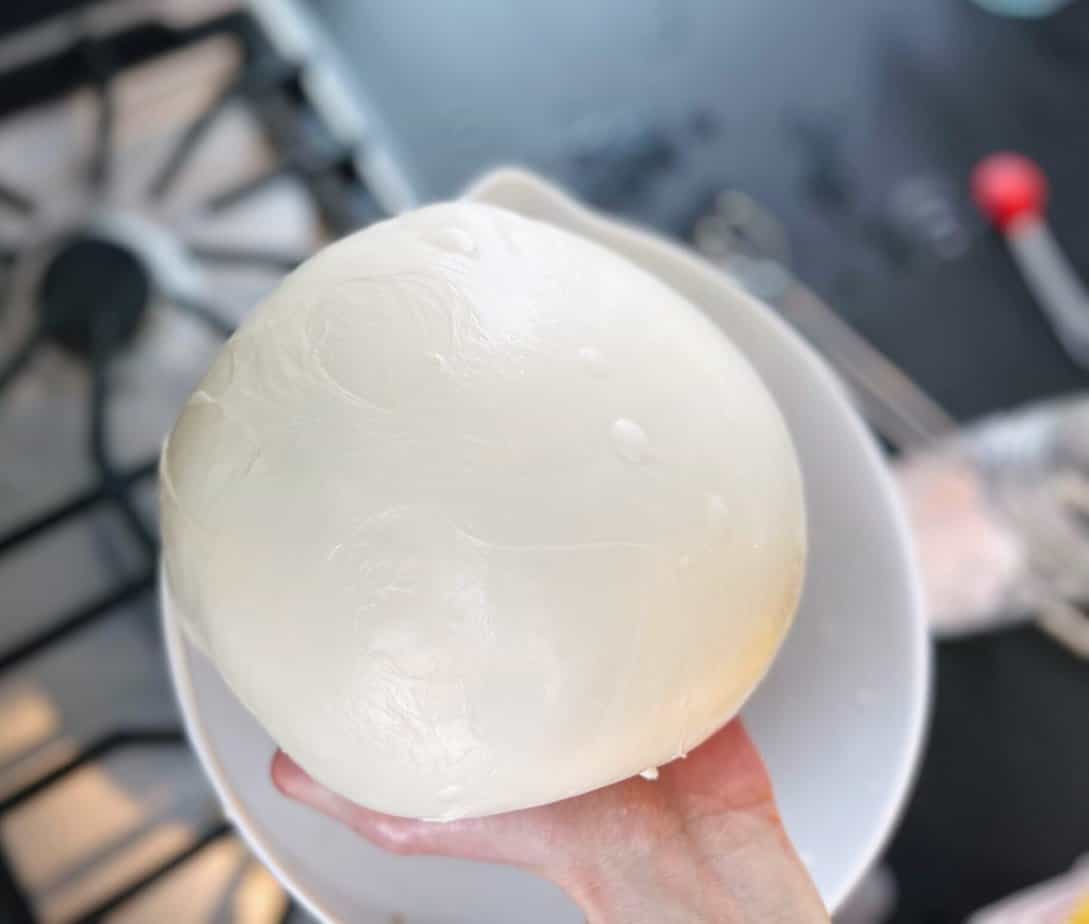
Transfer your ball of curds into a microwave-safe bowl. Sprinkle the 1 ½ teaspoons of salt over the curds. Microwave for 30 seconds. The cheese will be hot and begin to soften. Using your heat-resistant gloves (or two sturdy forks), begin to stretch and fold the cheese. It will resemble thick taffy. As it cools, it will become more resistant. Microwave for another 20-30 seconds, then stretch and fold again. Repeat this microwaving and stretching process 1-2 more times until your cheese is smooth, shiny, and pliable. It should stretch easily without tearing and have a beautiful, elastic texture. Form it into a smooth ball.
Tips for Perfecting Your Homemade Mozzarella
While this recipe is incredibly straightforward, a few insights can elevate your results:
- Milk Matters: Seriously, avoid UHT milk. It’s the most common reason for failed cheese batches. Opt for fresh, whole, pasteurized milk from your local dairy for the best flavor and texture.
- Don't Skimp on Squeezing: The more whey you remove, the better your mozzarella will stretch and the firmer it will be. Under-squeezed cheese will be too soft and won't hold its shape well.
- Heat is Your Friend (for Stretching): The key to a good stretch is keeping the cheese hot. If it cools too much, it won't stretch and will just tear. Don't be afraid to pop it back in the microwave for short bursts.
- Salt to Taste: The 1.5 teaspoons is a good starting point, but feel free to adjust. Some prefer their mozzarella very lightly salted, while others like a bolder flavor, especially if eating it plain.
- Storage: Homemade mozzarella is best enjoyed fresh, ideally within a day or two. If you have leftovers, store them in an airtight container in the refrigerator, ideally submerged in a little salted water or some of the reserved whey. This helps keep it moist.
- Serving Suggestions: The possibilities are endless! Slice it for a classic Caprese salad, melt it onto a homemade pizza, layer it in lasagna, or simply enjoy it with crusty bread and a sprinkle of flaky sea salt. For more quick cheese ideas using vinegar, check out our guide on Make Fresh Mozzarella Fast: Under 60 Minutes with Just Vinegar.
Conclusion
Making your own mozzarella cheese at home doesn't have to be an intimidating culinary adventure. With this simple, 3-ingredient, rennet-free recipe, you can create fresh, delicious, and incredibly satisfying mozzarella in under an hour. It's a fantastic project for any home cook, delivering a superior product that will impress your family and friends (and yourself!). So, grab that gallon of milk, a bottle of vinegar, and a pinch of salt, and prepare to embark on your easiest and most rewarding cheese-making journey yet. Happy stretching!
