Unlocking Creamy Perfection: Your Journey to Homemade Mozzarella Cheese
Imagine biting into a slice of mozzarella so fresh, it practically melts in your mouth, perfectly complementing the sweetness of a garden-fresh tomato and a drizzle of olive oil. What if we told you that this culinary dream isn't reserved for gourmet delis or Italian nonnas? You can achieve this exquisite freshness right in your own kitchen, often in less than an hour, with just a few humble ingredients. That's right, mastering how to make mozzarella cheese at home is surprisingly simple, deeply satisfying, and far more accessible than you might think. Forget complex processes involving exotic cultures or hard-to-find rennet. This guide strips away the mystique, revealing a straightforward method that relies on common kitchen staples. Prepare to be amazed as you transform a gallon of milk into luscious, stretchable mozzarella that will elevate your meals and impress your taste buds.Why Embark on Your Homemade Mozzarella Journey? The Unbeatable Freshness Factor
In a world where convenience often trumps quality, the decision to make something from scratch carries significant weight. When it comes to mozzarella, the difference between homemade and store-bought is night and day. Fresh mozzarella, still warm from the pot, possesses a delicate texture and a clean, milky flavor that pre-packaged alternatives simply cannot replicate. It's not just food; it's an experience. Beyond the unparalleled taste, there are several compelling reasons to learn how to make mozzarella cheese:- Pure Ingredients: You control exactly what goes into your cheese. No preservatives, no additives, just milk, a coagulant, and salt.
- Incredible Flavor and Texture: The subtle sweetness and creamy consistency of truly fresh mozzarella are incomparable. It's meant for savoring on its own, perhaps with just a sprinkle of sea salt, or torn into a simple Caprese salad.
- Speed and Satisfaction: Perhaps the most surprising benefit is how quickly this transformation occurs. The entire mozzarella-making process can often be completed in under 60 minutes. The joy of witnessing milk turn into beautiful, stretchable cheese before your eyes is incredibly rewarding. If you're looking for a quick and easy method, you'll be delighted to know that you can Make Fresh Mozzarella Fast: Under 60 Minutes with Just Vinegar.
- Budget-Friendly: Making your own cheese can be more economical than regularly purchasing high-quality fresh mozzarella from specialty stores.
Gathering Your Simple Ingredients & Essential Tools (No Rennet Required!)
One of the most appealing aspects of this method for how to make mozzarella cheese is its minimalist ingredient list. You won't need to hunt down specialized cheesemaking supplies like rennet or citric acid. Instead, we'll use a common pantry item as our magical coagulant.The Three Star Ingredients:
- 1 Gallon of Whole Milk: This is your foundation. For the creamiest, most robust mozzarella, whole milk is essential. The fat content in whole milk is crucial for the curds to properly form and for the resulting cheese to have that desired rich texture. While you might be tempted to use reduced-fat varieties, they often yield a drier, less pliable cheese that is harder to stretch. Stick with whole milk for the best results.
- Plain White Vinegar: This is our secret weapon! White vinegar acts as an acidic coagulant, effectively replacing traditional rennet. It gently causes the milk proteins to clump together, separating the solids (curds) from the liquid (whey). This simple swap makes homemade cheesemaking incredibly accessible.
- Salt: A crucial flavor enhancer. As you gain experience, you can experiment with the amount of salt to suit your personal preference, but we recommend starting with about 1 ½ teaspoons. You can use fine sea salt or kosher salt.
Essential Tools for Success:
To ensure a smooth and enjoyable cheesemaking experience, having the right tools on hand is half the battle. You likely already own most of these:- Large Heavy-Bottomed Pot: Big enough to comfortably hold a gallon of milk without boiling over. A heavy bottom helps prevent scorching.
- Large Spoon or Whisk: For stirring the milk as it heats.
- Food Thermometer: Absolutely critical for monitoring the milk's temperature. Accuracy here makes a big difference in curd formation.
- Large Strainer or Colander: To separate the curds from the whey.
- Large Bowl: To place under the strainer and collect the whey.
- Cheesecloth: Key for draining and squeezing out excess liquid. We recommend using at least 2-3 layers for effective straining and to prevent curds from slipping through.
- Microwave-Safe Bowl: A small bowl for reheating and stretching the cheese.
- Rubber Gloves (Optional but Recommended): For handling the hot cheese during the stretching phase.
Step-by-Step Guide: How to Make Mozzarella Cheese at Home
The journey from a gallon of milk to a ball of luscious mozzarella is an engaging and surprisingly quick one. Follow these steps closely, and you'll soon be enjoying your own homemade cheese.1. Gently Heat the Milk
Pour your gallon of whole milk into your large, heavy-bottomed pot. Place the pot over medium-low to medium heat. The goal here is a gentle, steady warmth. Stir the milk frequently with a large spoon, scraping the bottom of the pot to prevent any scorching. Use your food thermometer to monitor the temperature. You're aiming for the milk to reach approximately 115-120°F (46-49°C). Do not let it boil.
2. Introduce the Vinegar and Observe the Magic
Once the milk reaches the target temperature, remove it from the heat. Now, pour in your white vinegar. Stir the mixture gently but continuously for about 30 seconds. This is often the most exciting part of the process! As you stir, you'll notice the milk beginning to separate almost immediately. Small, soft white curds will start to form and cluster together, while a yellowish, translucent liquid (the whey) will appear. The mixture will become increasingly thick and difficult to stir – this is a good sign!
3. Rest and Coagulate
After stirring, cover the pot with a lid and let it rest undisturbed for 15 minutes. During this time, the vinegar continues its work, encouraging the curds to firm up and fully separate from the whey. Patience here ensures a good yield of cheese.
4. Strain the Curds from the Whey
While your curds are resting, prepare your straining station. Place your large strainer or colander over a large bowl in your kitchen sink to catch the draining whey. Line the strainer with 2-3 layers of cheesecloth. Carefully pour the entire contents of the pot – curds and whey – into the cheesecloth-lined strainer. Alternatively, you can use a large slotted spoon to transfer just the curds into the cheesecloth, discarding the bulk of the whey directly from the pot.
Once all the curds are in the cheesecloth, gather the corners of the cloth together, forming a sack around the curds. Gently but firmly squeeze out as much of the liquid whey as you possibly can. The harder you squeeze, the less moisture will remain in your cheese, which will make it easier to stretch and give it a firmer texture. You should be left with a rough, fairly dense ball of cheese.
Pro Tip: Don't discard the whey! It's a nutrient-rich byproduct that can be used in baking (replacing water in bread recipes), as a base for soups, or even to water plants.
5. Salt and Begin the Stretch
Transfer your roughly formed cheese ball into a small, microwave-safe bowl. Sprinkle it with your desired amount of salt (start with ½-1 teaspoon at this stage, you can add more to taste later if needed). Place the bowl in the microwave and heat for 30 seconds.
Carefully remove the bowl (the cheese will be hot!). Using a sturdy spoon, or wearing rubber gloves for direct handling, try to stretch the cheese. It will be soft and pliable. Fold the ends over each other, then stretch again. The stretching motion helps to align the proteins, creating that characteristic smooth, elastic texture of mozzarella.
6. Repeat and Refine the Stretch
The cheese will cool quickly and become more resistant to stretching. Return it to the microwave for another 30 seconds. Remove, and continue to stretch and fold. You'll notice it becoming smoother and more elastic with each stretch. Repeat this microwave-stretch-fold process one or two more times, or until the cheese is smooth, glossy, and holds its shape without tearing.
If you find the cheese is tearing rather than stretching, it might be too cool, or you didn't drain enough whey. A quick reheat in the microwave for another 15-20 seconds usually helps. The goal is to develop a smooth, shiny surface.
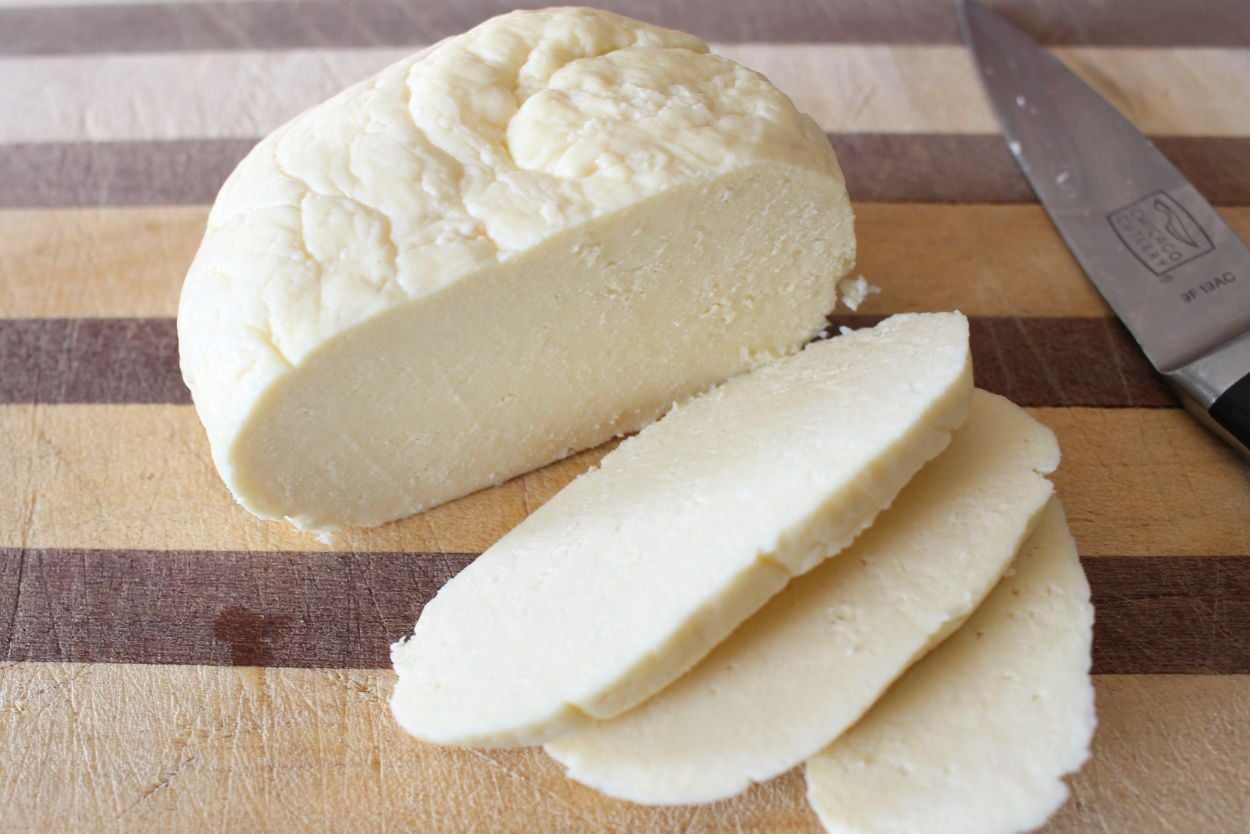
7. Form Your Mozzarella
Once the cheese is smooth and elastic, gently shape it into a neat ball or log. You can lightly press and mold it with your hands until it achieves your desired form. It’s now ready to enjoy!
